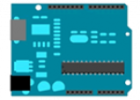
GPS Data Logger using the Netduino
The last blog post, I described how to use the Netduino and the ladyada GPS shield to collect GPS points. Since that time the Netduino folks have made public an alpha release of firmware that supports mounting an SD card.
If you are not into accepting the risks and short falls of alpha code, then you may not want to deploy this to your hardware. There were some issues with the firmware running in Parallels on my Mac. That is not a big deal to me. I appreciate the opportunity to provide feedback and get a glimpse of the new SD card mounting code. Just wanted to be up front….buyer be ware!
Running the Netduino Firmware 4.1.1 alpha 1 software my main program now looks like the following:
public class Program
{
    private const string _root = "SD_Card";
    private static string _path;
    private static FileStream _fileStream;
    private static StreamWriter _writer;

    private static readonly OutputPort _led2 = new OutputPort(Pins.GPIO_PIN_D3, false);

    public static void Main()
    {
        // Mount the SD card
        //
        StorageDevice.MountSD(_root, SPI.SPI_module.SPI1, Cpu.Pin.GPIO_Pin12);

        // Determine the next file name.
        //
        int fileIndex = 0;
        do
        {
            fileIndex++;
            _path = Path.Combine(_root, "gpsData" + fileIndex + ".txt");

        } while (File.Exists(_path));

        // Open the file stream and the stream writer.
        //
        _fileStream = new FileStream(_path, FileMode.CreateNew, FileAccess.Write, FileShare.None, 512);
        _writer = new StreamWriter(_fileStream);

        // Open the serial port and turn the GPS unit on.
        //
        Thread.Sleep(500);    // The GPS seems to need a little delay
        SerialPort serialPort = new SerialPort("COM1", 4800, Parity.None, 8, StopBits.One);
        OutputPort powerPin = new OutputPort(Pins.GPIO_PIN_D2, false);

        // Create a gps reader, hook up the event, and start the reader thread
        //
        Reader gpsShield = new Reader(serialPort, 100, 0.1);
        gpsShield.GpsData += GpsShield_GpsData;
        gpsShield.Start();

        // The main thread is done.
        //
        Thread.Sleep(Timeout.Infinite);
    }

    private static void GpsShield_GpsData(GpsPoint gpsPoint, string rawLine)
    {
        try
        {
            // Write the raw line to the data file.
            //
            _writer.WriteLine(rawLine);
            _writer.Flush();
            _fileStream.Flush();

            // Flash the led to indicate.
            //
            _led2.Write(true);
            Thread.Sleep(200);
            _led2.Write(false);
        }
        catch (Exception ex)
        {
            //Debug.Print("Exception: " + ex);
        }
    }
}
The first thing that happens in the above code is the SD card is mounted. You are allowed to name the mounted drive. In this case, I have chosen “SD_Card” as the name. The code then determines the next available file name. The process simply looks for files that exist with the name “gpsDataX.txt” where X is a number starting with 1.
Once an available file name is found, the code opens a ‘FileStream’ and wraps a “StreamWriter’ around it. These two objects are global static variable.
The communication to the GPS unit is then established and a ‘Reader’ object created. This code was covered in the previous blog and I will not spend any time on it here. I will point out that the CTOR for the ‘Reader’ object takes three parameters. The last parameter is the minimum distance between GPS points written to the SD drive. In this case, this number is set to 0.1 miles.
The main thread is then put to sleep for ‘Timeout.Infinite’ time. The main thread can be used to do other work. For instance, you may want to add a display device to show the current location information.
The ‘GpsData’ event handler uses the ‘StreamWriter’ object to write the raw GPS sentence to the mounted SD card. This data is then flushed to the drive. This event handler then flashes ‘LED 2’ for 200 milliseconds to provide an indication that data was written.
Summary
Although this is an alpha release, I like the API for mounting the SD card. Once it is mounted, then it is used like any other disk. Be sure to check the Netduino site regularly if you decide to use the alpha release. I am sure there will be a beta or RTM soon.


It’s an interesting thought – we’ve tried doing something similar with an external provider at work, and I’ve just ordered my first netduino and am looking at what I could do with it.
Which not being an electronics guy, I’m kinda wondering how over my head I’ll get myself 😉
It makes me wonder, it looks like that shield takes over the entire netduino, all ports, etc – there’s no chance of also hooking up something that would send the data back every half hour or something via 3g?